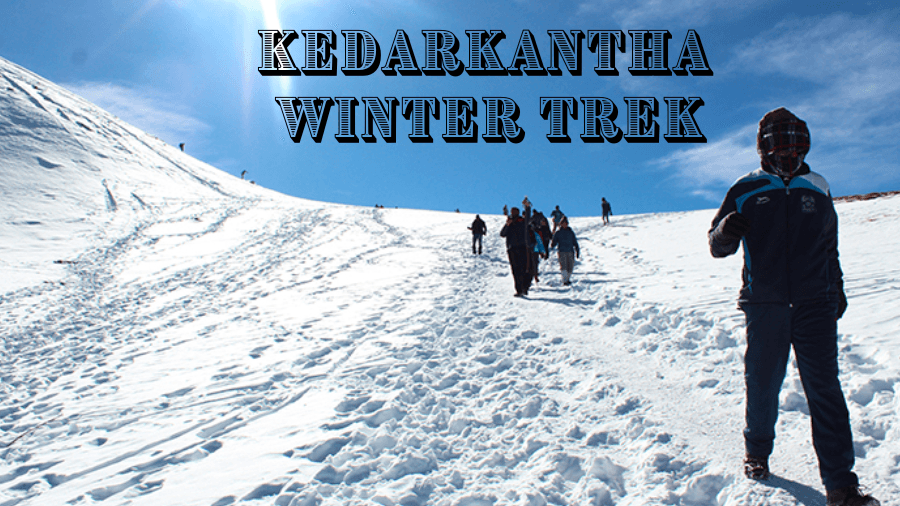
About the Kedarkantha Trek:
Kedarkantha Trek!!! The name itself gives me goosebumps and those butterflies in my stomach. The Himalayas are not just snow-capped mountains they are emotions. At the height of 12,500 feet, passing through rough terrains of pine trees forest, mesmerizing views of the magnificent Himalayan range and layer of white snow all over was like icing on the cake, and good company made this trek a memorable one. The minute you think of snow trekking in India, one of the most gorgeous treks that come to mind is the Kedarkantha summit trek. This trek introduces you to a winter wonderland unlike any other. This trek is about exploring the fun side of trekking and is a perfect fit for anyone trying their hand at Himalayan trekking for the first time. This trek is easy and comfortable for a novice summiter and gives every Nomad an opportunity to summit a snow-laden peak in Uttarakhand.
Kedarkantha Trek at a Glance
- Difficulty: Moderate (Suitable for Beginners)
- Kedarkantha Trail: Dense Pine & Oak forests, open meadows & snow during winters.
- Region: Uttarakhand
- Base Camp: Sankri (200 kms from Dehradun)
- Kedarkantha Altitude: 6,000 ft at Sankri to 12,500 ft. at Kedarkantha Peak
- Kedarkantha Trek Distance: 25 km (Approx)
- Kedarkantha Trek Duration: 4 days (Sankri – Sankri)
- Best Season for Kedarkantha Trek: December to April
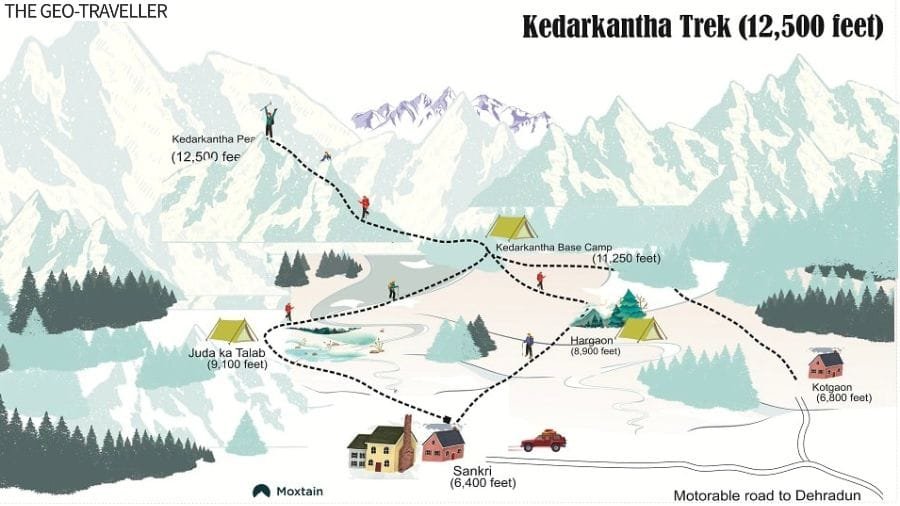
Kedarkantha Trek at a Glance The Kedarkantha trek starts from the quaint village of Sankri in Uttarakhand, located at the height of 6,000 feet. With panoramic views of snow-clad peaks almost all throughout the trail, the Kedarkantha trek takes one through dense pine and oak tree forests, frozen lakes, and snowy trails toward the Kedakantha peak, situated at an elevation of 12,500 feet. The entire trek takes around 4 days, starting from Sankri and back, apart from additional days for traveling from Dehradun and beyond.
Mythology of Kedarkantha
As is with most destinations around Uttarakhand smeared in mythological references, Kedarkantha is no different. The most popular reference relating to the place comes straight from the Mahabarata, which claims Kedarkantha to be the place where Lord Shiva, in his bull avatar, sought refuge from the Pandavas and meditated in the valley but on being disturbed by the locals, he later fled towards Kedarnath. The Trishul of Lord Shiva, erected at its peak, is also believed to protect the valley and its people.
Best Time to do the Kedarkantha Trek
Although the Kedarkantha trek can be done throughout the year, it is one of the few Himalayan treks accessible during winter, and hence it is best done during the winter months between December all the way towards the end of April, giving trekkers an opportunity not just to witness its snowy landscapes but also the experience of trekking on the crackling snow. With just the right amount of snow and devoid of extreme temperature changes, the Kedarkantha trek is not too challenging and hence suitable for even first-timers.
| Month | Maximum Day Temperature | Minimum Night Temperature | Weather |
| May to June (Summer) | 20°C | 6°C | -No snow |
Itinerary for Kedarkantha Trek
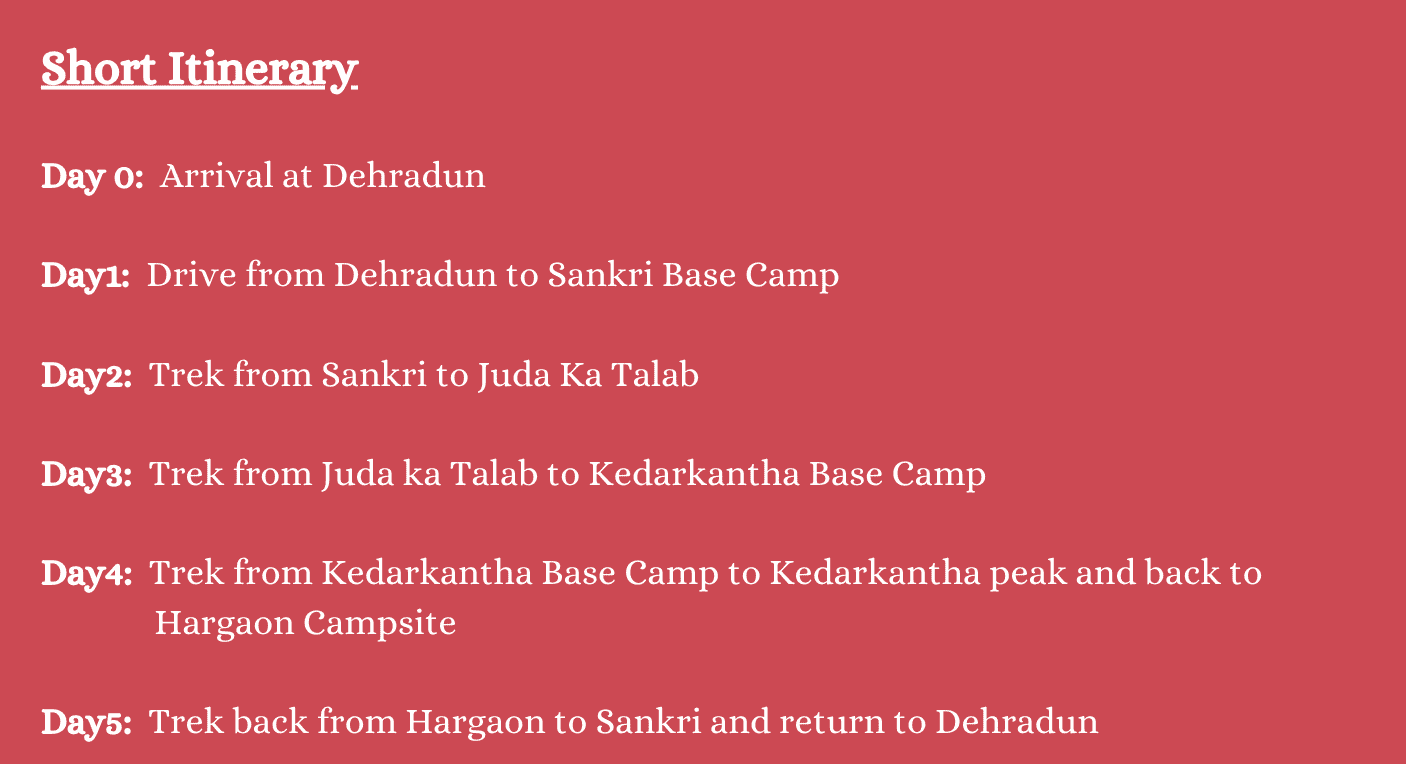
Short Itinerary
Kedarkantha Trek – Detailed Itinerary
Day 0: Arrival at Dehradun
Dehradun forms the gateway towards Sankri and is well connected to major cities, the closest and cheapest option being Delhi. Mumbai to Dehradun
- Distance: 1682 km
- Duration: 24-30 hours
By Air: Flights from most major cities are available to the Jolly Grant Airport at Dehradun. By Train: Trains are available from Mumbai (Bandra Terminus) and Panvel to Dehradun, including the BDTS HW Express, which leaves at 12:05 AM from Bandra and reaches Dehradun at 5:35 PM. Cost: Starting from ₹590 Per ticket (Sleeper) to 1570 (AC)
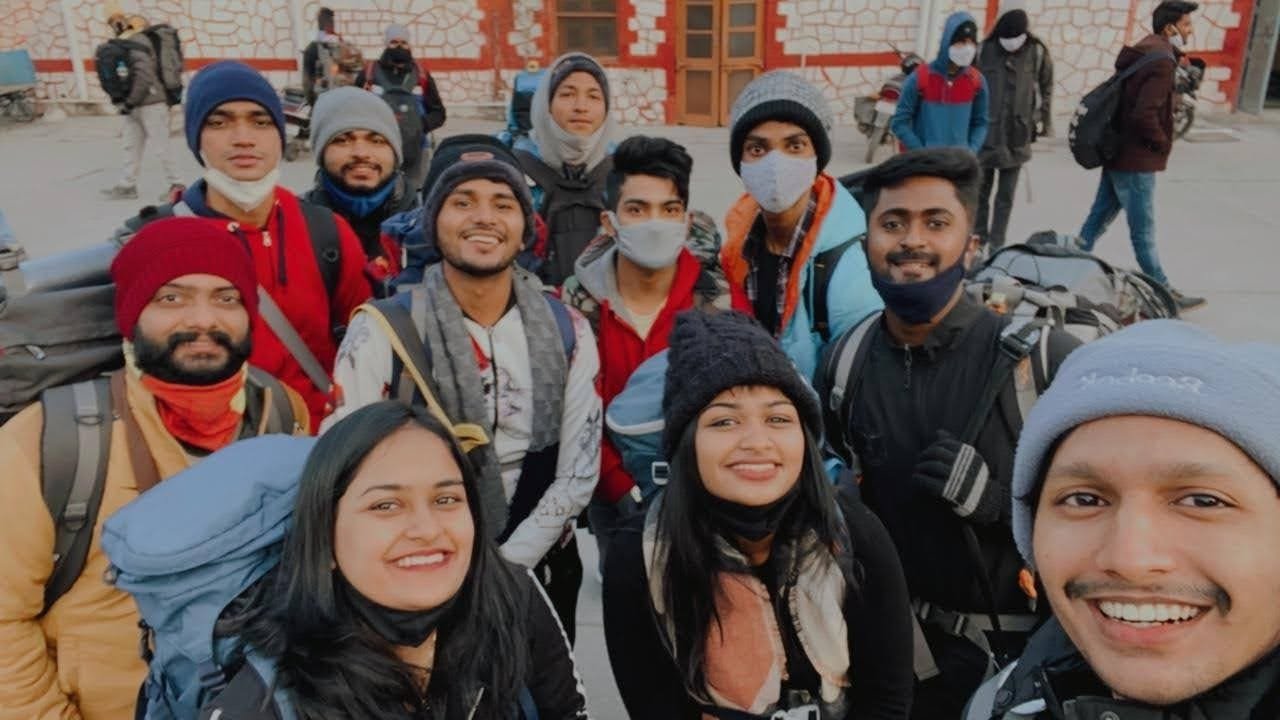
Aren’t they adorable?
Day 1: Dehradun to Sankri Base Camp
Leave Dehradun early in the morning (6 AM) and reach Sankri by evening to catch the beautiful sunset from this quaint little village steeped in natural beauty. This also gives you ample time to do some last-minute preparations and get some good rest before starting the trek the next day.
- Distance: 220 km
- Duration: 10 – 11 hours
- Altitude: 6,400 feet
How to Reach Sankri from Dehradun?
One can reach Sankri from Dehradun only by road, either by a private vehicle, a bus or by hiring a private cab. **By Private Vehicle: **The following route can be taken to reach Sankri from Dehradoon if coming by your own vehicle.
Dehradun – Purola – Mori – Naitwar – Sankri
https://www.google.com/maps/embed?pb=!1m42!1m8!1m3!1d439127.26752464595!2d77.7067598!3d30.6992284!3m2!1i1024!2i768!4f13.1!4m31!3e0!4m5!1s0x390929c356c888af%3A0x4c3562c032518799!2sDehradun%2C%20Uttarakhand!3m2!1d30.316494499999997!2d78.03219179999999!4m5!1s0x3908b0236ebad29b%3A0xc93731b139c7d29b!2sPurola%2C%20Uttarakhand!3m2!1d30.8788542!2d78.0851607!4m5!1s0x3908a90bf5bcd8ed%3A0xeb7cd398b9e62d94!2sMori%2C%20Uttarakhand!3m2!1d31.0187848!2d78.0473617!4m5!1s0x3908a90c05555555%3A0x166d9046bf530623!2sNaitwar%20Mori%20Hydro%20Electric%20Project%2C%20Mori-Sankari%20Road%2C%20Mori%2C%20Uttarakhand!3m2!1d31.0187848!2d78.0473617!4m5!1s0x3908a75bf2352605%3A0x1c29c5e50d0fb4c0!2sSankri%2C%20Uttarakhand!3m2!1d31.078120199999997!2d78.1842303!5e0!3m2!1sen!2sin!4v1666772747327!5m2!1sen!2sin**By Bus: *Two buses are available from Dehradun to Sankri from the Mussoorie Bustand (4 km away from ISBT), one at 5 AM & another at 7 AM. Cost: ₹300 Per ticket In case you miss the morning bus, connecting buses are also available to the nearby villages of Purola or Hanol. From here, buses, as well as shared taxis, are available towards Sankri. **By Cab: *You can also hire a shared taxi from Dehradun to Sankri Cost: ₹5000 – ₹6,000 per cab for up to 5 people (*As on October 2022. Please check the latest timings & price before arrival)
Reach Sankri by 6 PM in the evening and rest for the rest of the evening
Day 2: Sankri to Juda Ka Talab
- Distance: 5 km
- Duration: 5 hours
- Altitude: 9,100 feet
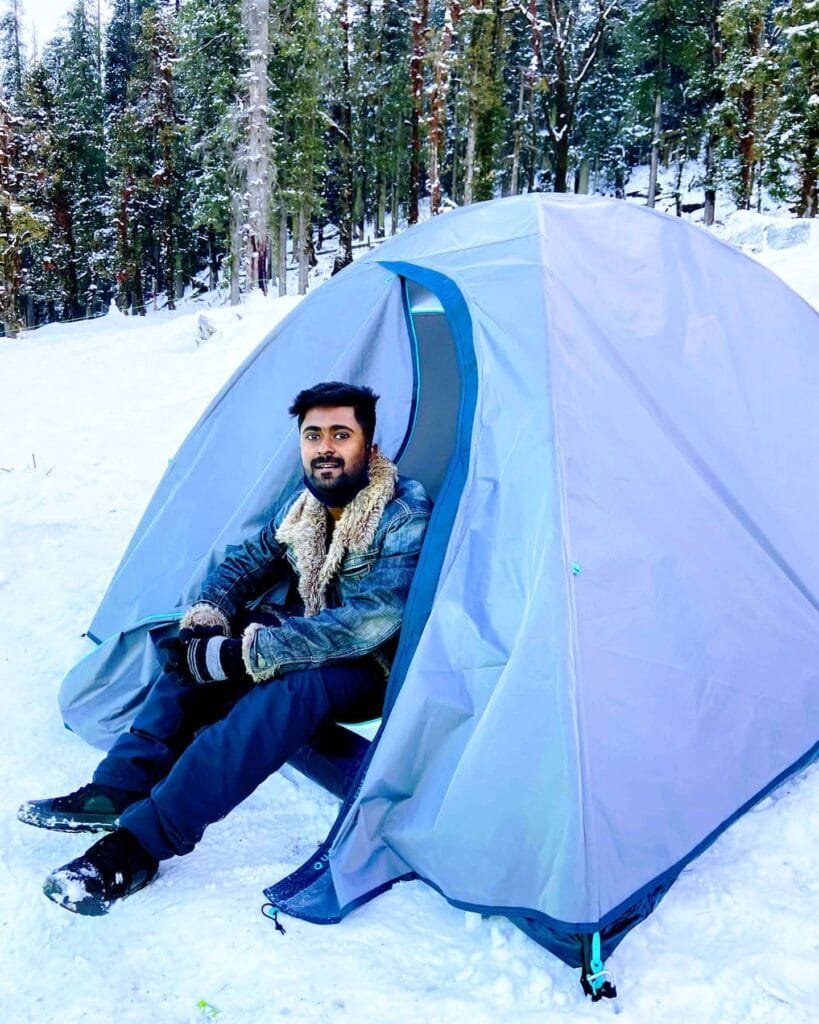
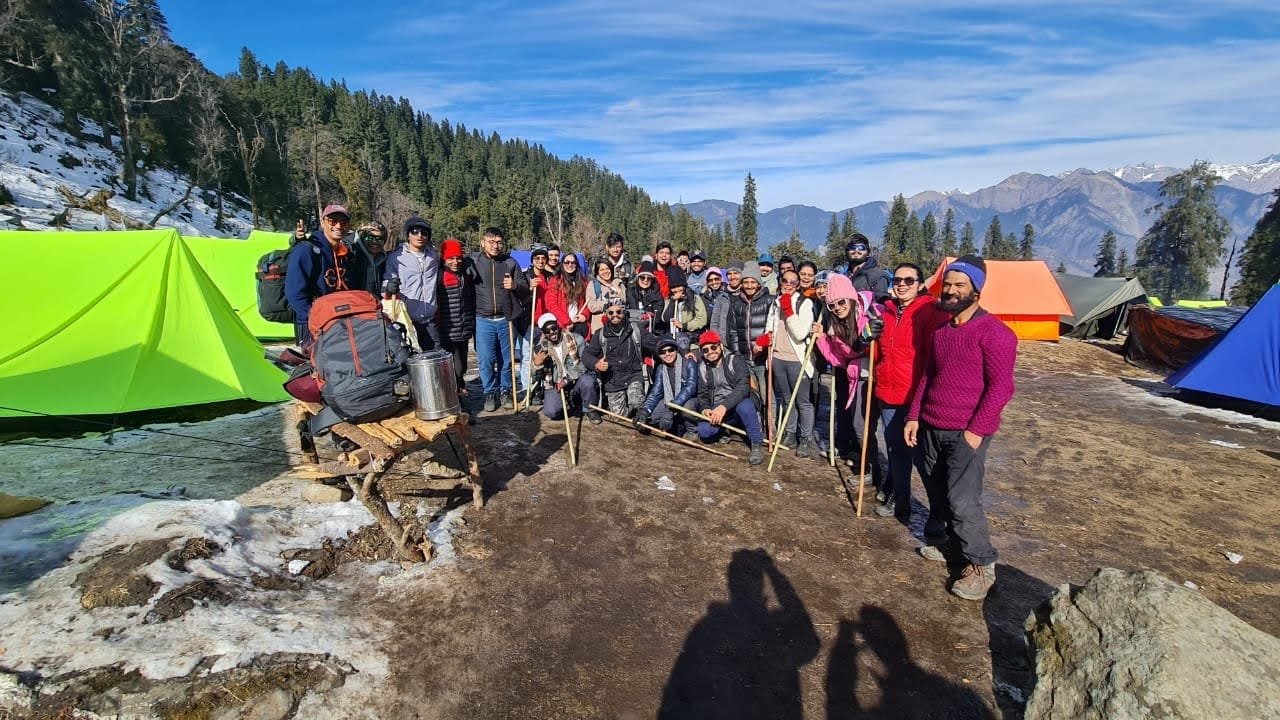
Camping next to Juda Ka Talab A roughly 5 km trail from the base camp through green meadows and thick pine and oak forests take you to the picture-perfect Juda Ka Talab campsite. As the name suggests, Juda Ka Talab is a serene frozen lake that once used to be two lakes but has now conjoined as one.
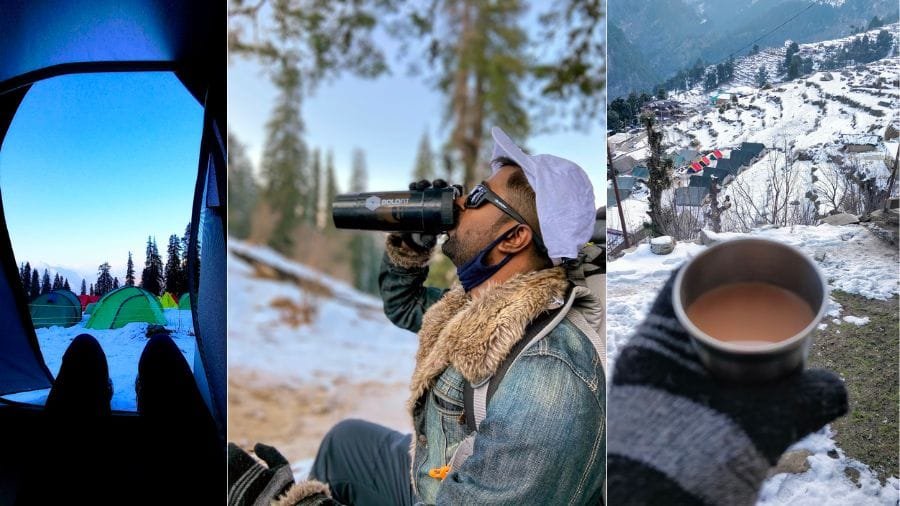
Some snaps from the campsite
Day 3: Juda ka Talab to Kedarkantha Base Camp
- Distance: 4 km
- Duration: 3 hours
- Altitude: 11,250 feet
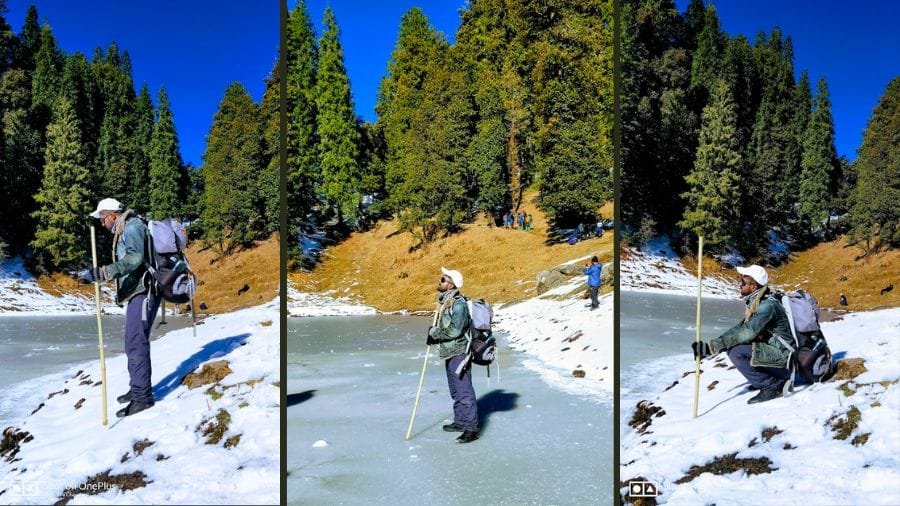
The Frozen “Juda ka Talab” From Juda Ka Talab, a 4 km trek initially through thick pine forests later opens up to lofty mountain views leading you to the Kedarkantha Base Camp at 11,150 feet. From here, one can enjoy panoramic views of the surrounding snow-clad peaks, including Bandarpoonch, Swargarohini, Kala Nag, and Ranglana to name a few. The Kedarkantha peak is also clearly visible from here.
Day 4: Kedarkantha Base Camp to Kedarkantha peak to Hargaon
- Distance: 6 km
- Duration: 6 – 7 hours
- Altitude: 12,500 feet to 8,900 feet
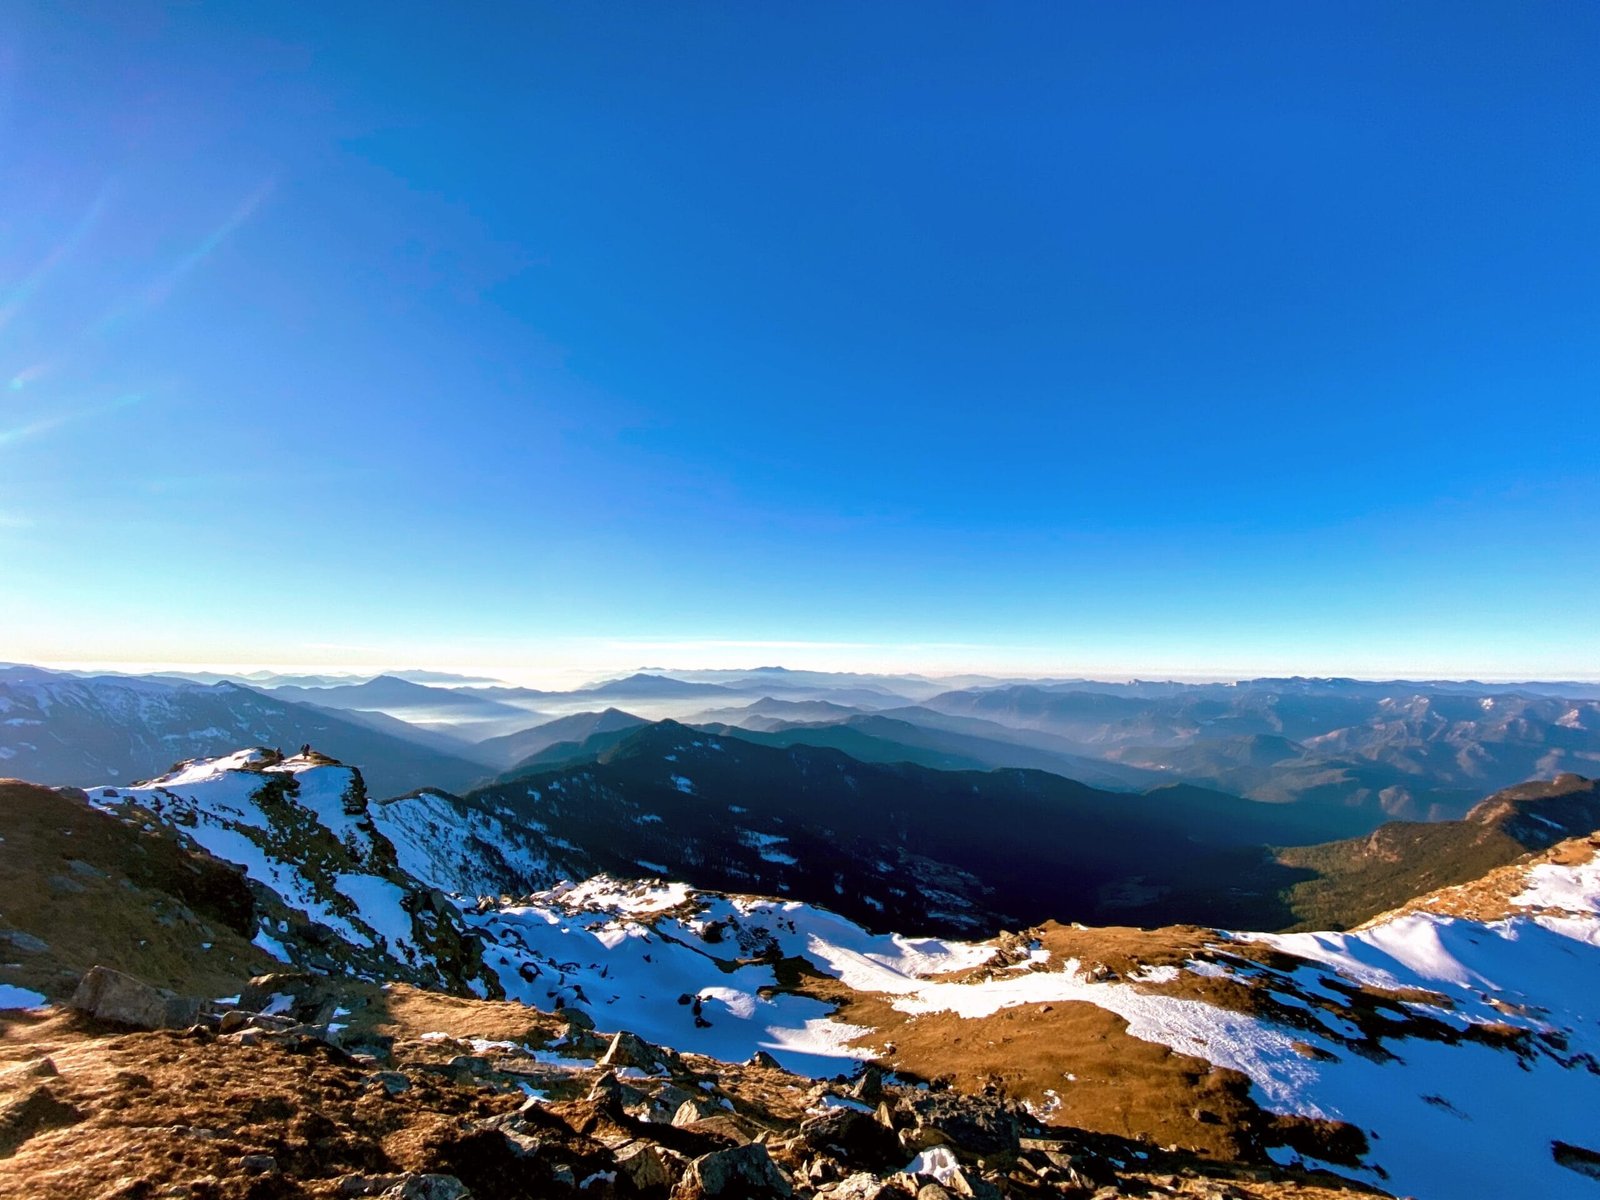
Kedarkantha Peak The Kedarkantha summit, marked by a Trishul pointing to the sky, is around 2 hours away from the base camp and can be reached through several routes. It is advisable to start the trek before dawn (as early as 3 AM) in order to catch the mesmerizing sunrise (usually around 7 AM) from atop the peak. Although the trail starts off with a gradual ascend, as you get closer to the peak, the trail becomes more challenging, with almost 80-degree inclines at a few stretches.
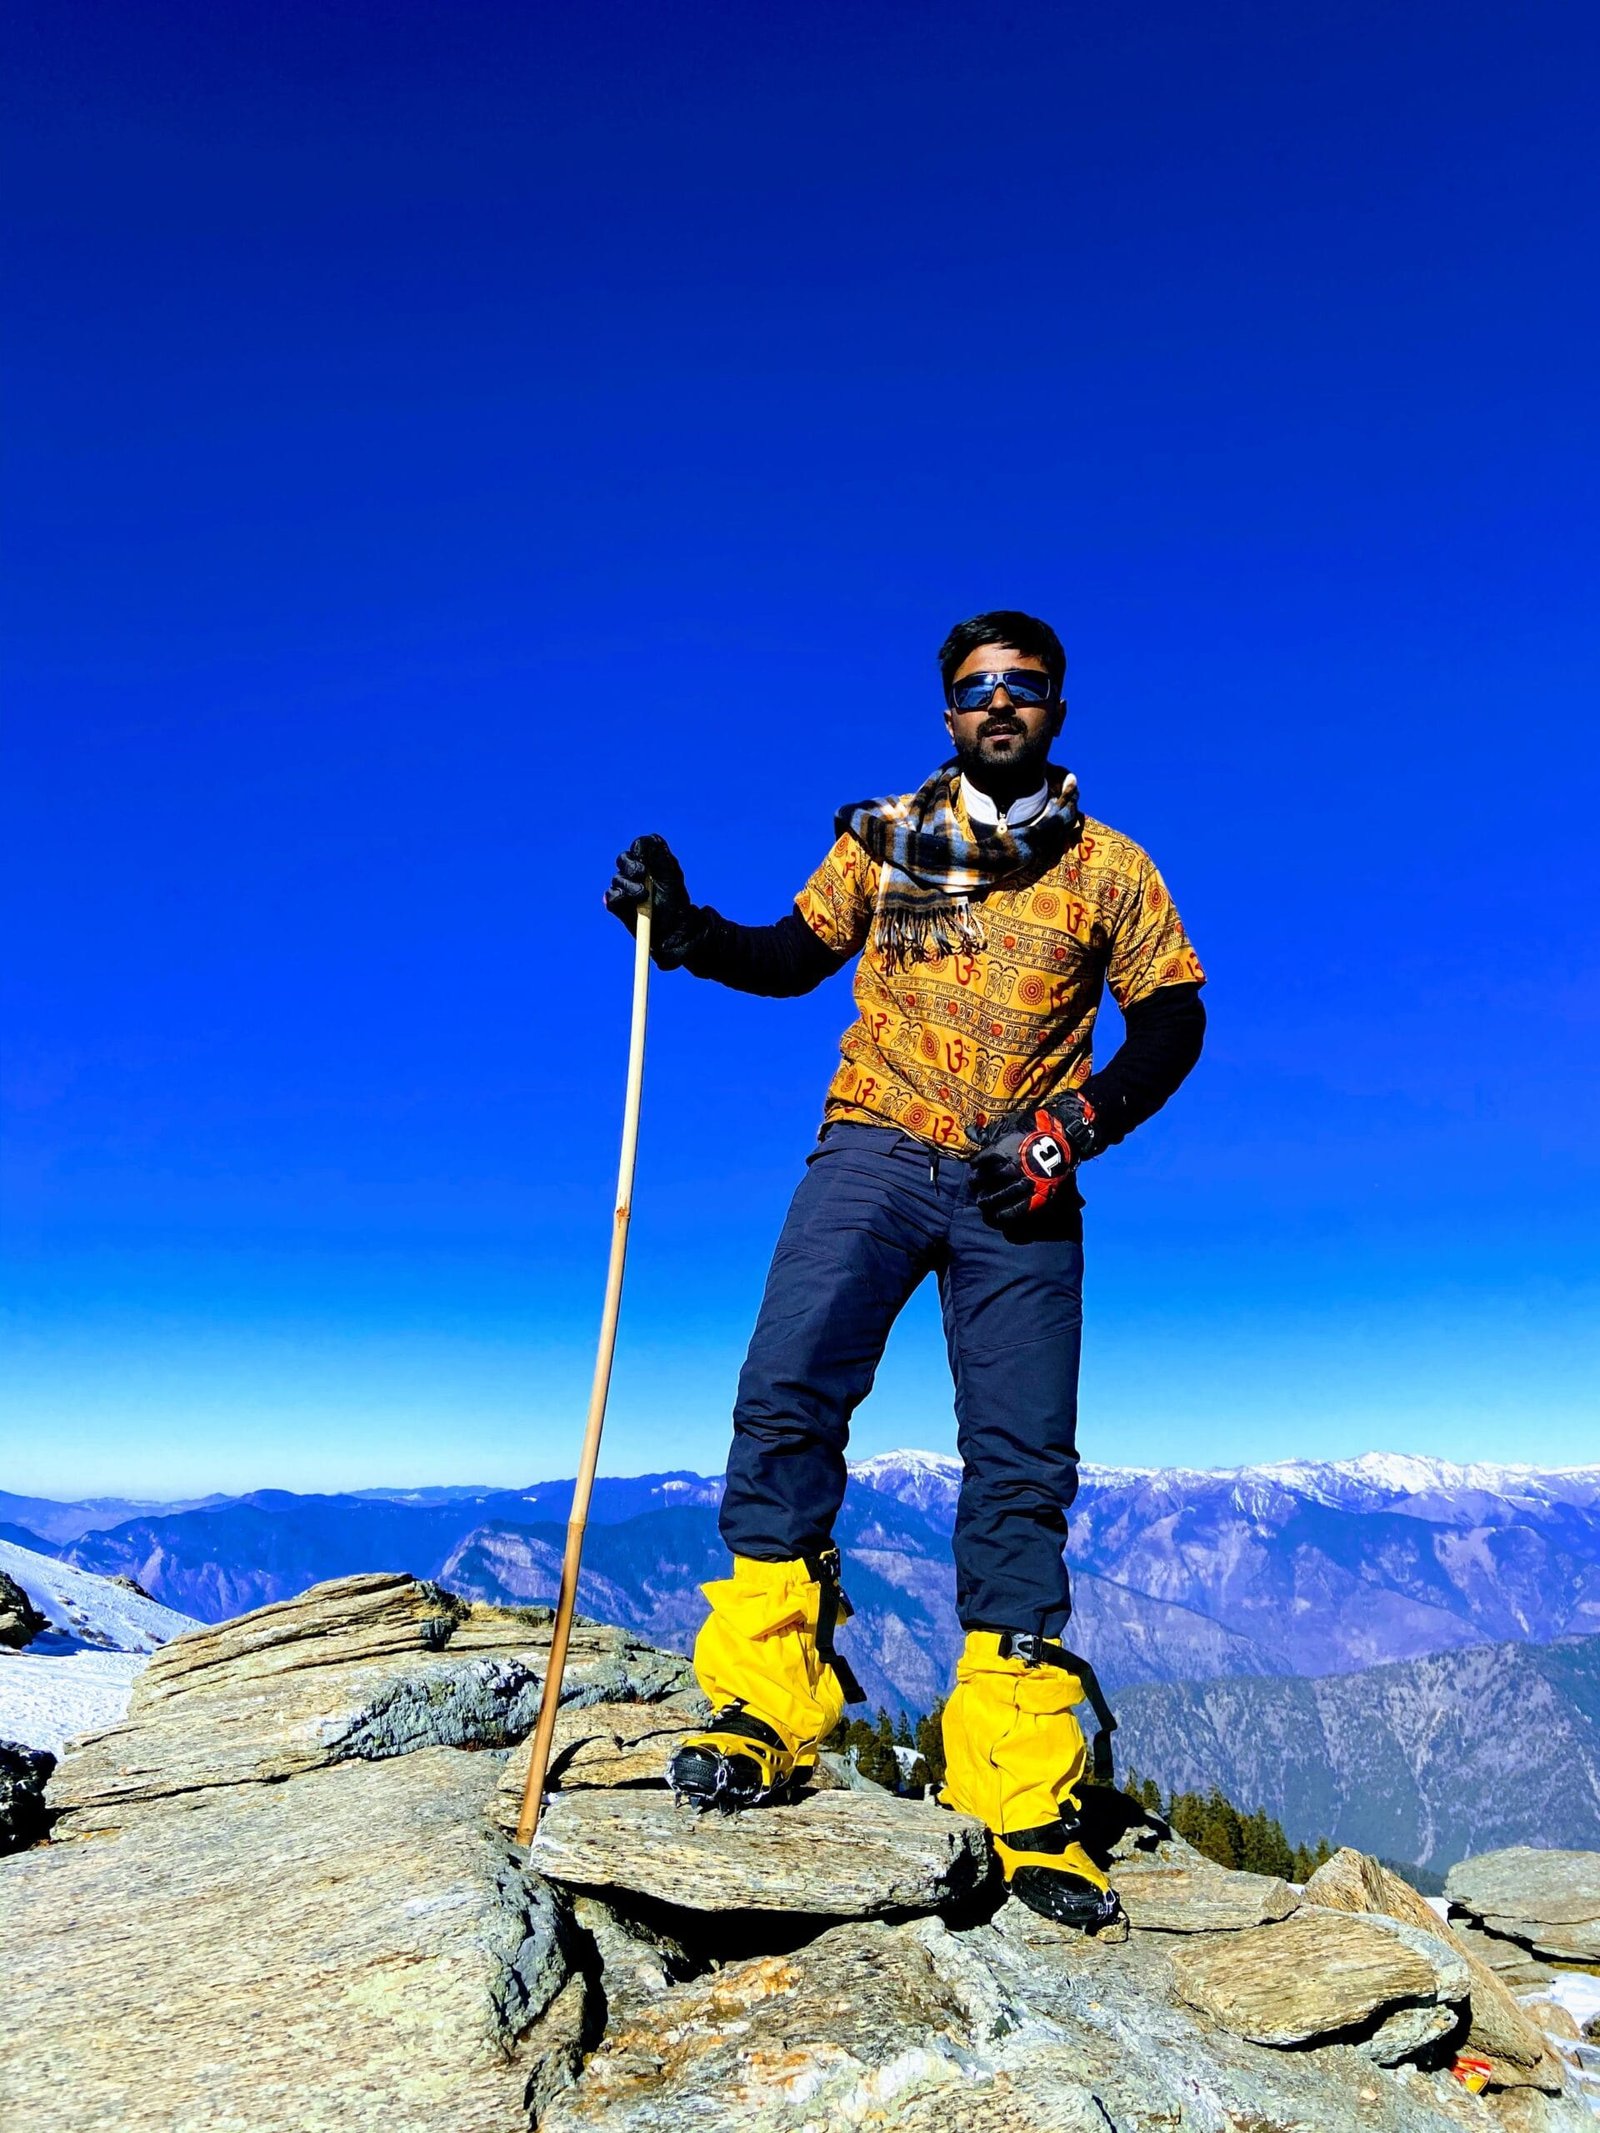
The Summit! Apart from the breathtaking sunrise, the Kedarkantha summit offers 360-degree views of the surrounding Himalayan ranges, including Gangotri, Yamunotri, Chanshil Pass, and Kinnaur Kailash ranges. From the summit, descend back to the Kedarkantha base camp and further down towards the Hargaon campsite.
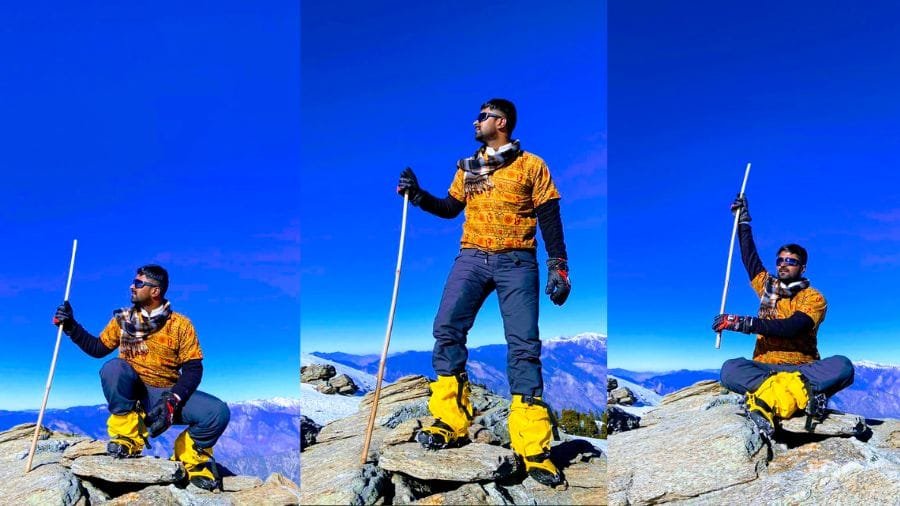
Dumping all my gallery here! :P
Day 5: Hargaon to Sankri/Dehradun
- Distance: 6 km
- Duration: 4 hours
- Altitude: 6,400 feet
One last time! The trail from Hargaon to Sankri is well-marked along a stone-paved route and takes relatively less time owing to the descent. You also get splendid views of the Har ki Dun valley along the way. Once back at Sankri, you can either spend the rest of the day at Sankri and explore the beautiful Himalayan village or head back to Dehradun the same day, provided you come by your own transport or private cab. Buses are only available from Sankri to Dehradun at 5 AM & 7 AM every day and take around 10 hours to reach.
Accommodation Options During Kedarkantha Trek
Stay at Sankri
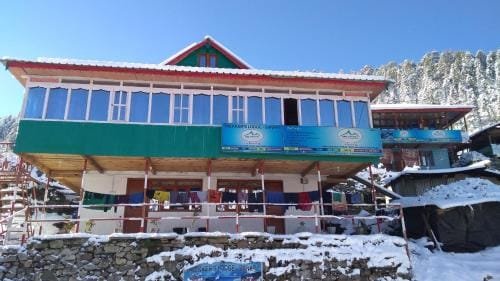
Sankri Homestay Sankri is a remote village with a limited number of homestays and a few hotels for accommodation. Homestays offer a more budget-friendly option while giving you an authentic experience of the Himalayan way of life. However, prior booking becomes mandatory during the winter seasons from December to March as this is the peak trekking window in this region. Do note that Sankri does not have ATMs or Banks, hence carry sufficient cash with you before your arrival here.
Stay During Kedarkantha Trek
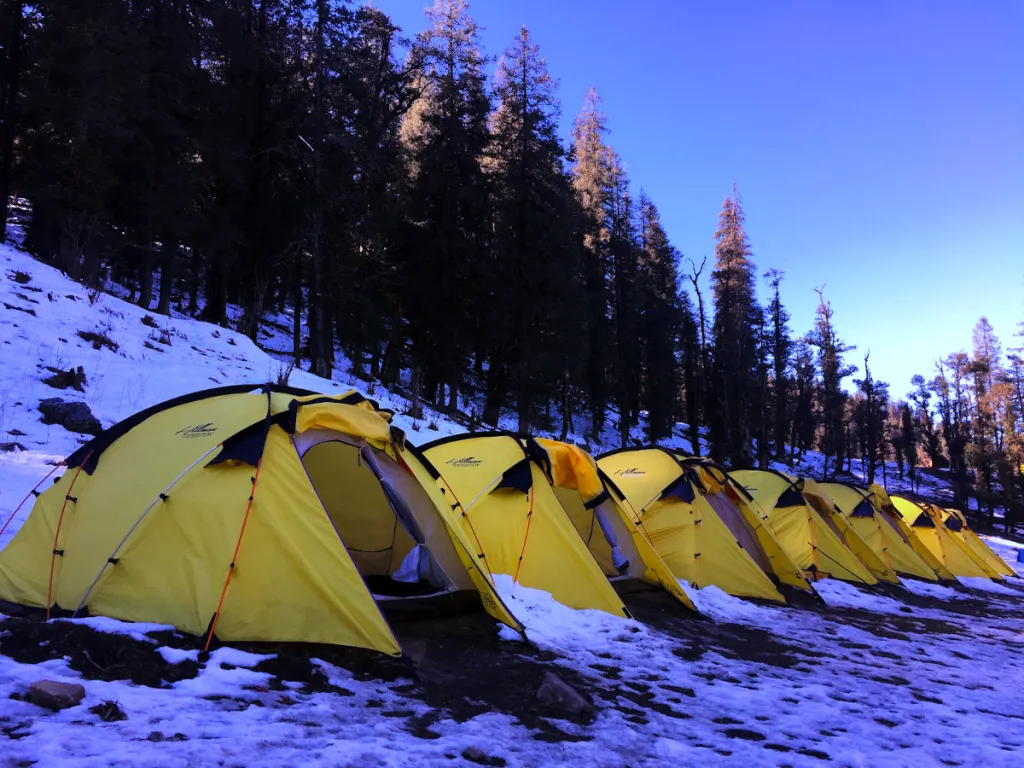
Campsite near “Juda Ka Talab” Apart from Sankri, there are no homestays all throughout the Kedarkantha trail, and relying on the existing campsites on the trail or camping on your own is your only option. If you happen to be trekking with any organization or opting for a trekking package that includes accommodation, you would not have to worry about the same as you will be staying in their designated campsites along the trail. If you plan to camp on your own, you must carry all necessary camping equipment, including tents, sleeping bags, liners, etc. The same can also be rented out from Sankri.
Food Options during Kedarkantha Trek
Apart from Sankri, there are very limited tea houses along the trail that offer a few simple options like Maggi and some snacks. However, the chances of them being open are uncertain and hence should not be entirely relied upon. Opting for a trekking package that covers food and accommodation would be your best bet for arranging the same. Those wanting to trek by themselves will obviously have to carry the required supplies along with a portable stove and fuel.
Permits & Local Guide for Kedarkantha Trek
As a mandatory rule enforced by Govind Vihar National Park authorities, Kedarkantha trekking permits are issued only if you are accompanied by a local guide registered with the forest department. The local guide will also help you with getting the required permits from the forest office at Sankri. Hiring a local guide not only ensures your safety by making sure you stay on the right trail and help deal with emergencies and other uncertainties while on the trek, but it also gives you an interesting insight into the local culture and geography of the region. Pre-booking a local guide is essential, especially during peak seasons. Cost of Local Guide: ₹1,000 per guide Cost of Permits for Kedarkantha Trek: ₹50 per day
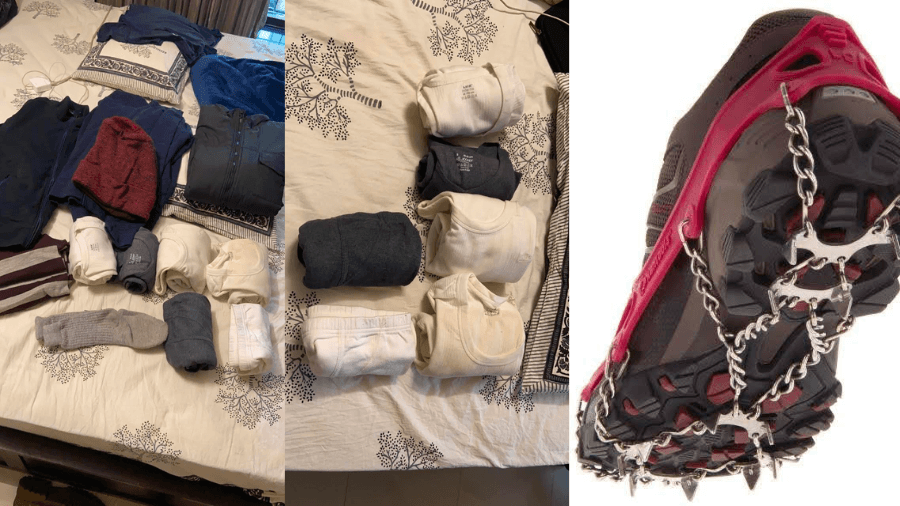
Things to Carry for the Kedarkantha Trek
The following are some of the essential items required while going on the Kedarkantha Trek. Do note that if you are planning to undertake the trek by yourself and not with an organization or package, additional items for camping and cooking will also be required to be taken by you.
Things to carry!
| Category | Item |
| Clothes | T-shirts/shirts, trekking pants Windproof Jacket Raincoat |
| Winter Wear | Minimum 4 to 5 layers of clothing is required during winters including woolen f… |
Things to Know Before Attempting the Kedarkantha Trek
- There are no ATMs after Mori, so carry a sufficient amount of cash from Dehradun itself for the entire trek.
- There is no mobile connectivity after Purola. Only a sparse BSNL network is available in and around Sankri.
- Prebooking of accommodation, guides, and equipment is compulsory in the peak season between November to January.
- Pack light as you will have to carry your backpack for the entire trek. It is advisable to keep your backpack weight under 10 kgs.
- Choose for train travel to Dehradun while coming from Delhi as the same is more comfortable and avoids delays.
- Hydrate yourself throughout the trek, starting when you wake up.
- You can opt to trek by yourselves along with a local guide or choose to go with one of the many organizations that conduct the Kedarkatha trek. The latter ensures that all your accommodation, food, and other formalities are taken care of for a hassle-free trekking experience.
- Be a responsible trekker and make sure you do not litter the trail and surrounding areas and to bring back any waste or plastic items and dispose of the same responsibly.

Comments
Have a thought, a question, or a memory to add? Leave a comment — no account needed.